How to Install Waterproof Stainless Steel Cable Glands
 2025.10.10
 Industry news
Whether you are working on telecommunication cabinets, outdoor sensors, or industrial enclosures, you often need a Waterproof Cable Gland that can prevent moisture and ingress, and at the same time a Stainless Steel Cable Gland that can resist corrosion, mechanical stress, and chemical attack. In many installations, you may even want a gland that combines both waterproof capability and stainless steel construction.
Summary & tips
1. Preparations before installation
Before you start, good preparation will save time and reduce errors. Here are key preparatory steps:
A. Safety & power off
Always ensure the circuit is de-energized before starting. Never work on live cables. Also, clean your workspace, avoid debris, dust, grease, or liquids around the entry point.
B. Tools & materials checklist
You will need:
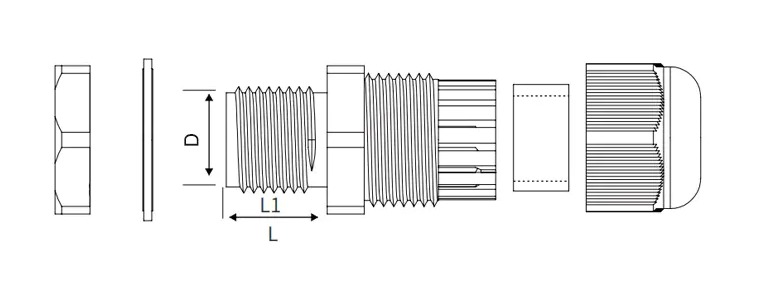
The waterproof stainless steel cable gland (body, sealing ring, nut, etc.)
Lock nut, washer, or backing nut (if required)
Cable stripper / knife
Spanners or wrenches sized for the gland
Thread sealant (if applicable) or PTFE tape
Torque wrench (if precise tightening is needed)
Cleaning solvent or alcohol wipes
Marker or tape
C. Cable preparation
Measure the outer diameter of your cable. Strip insulation at the end to the required length (so that the conductors are exposed but leaving enough sheath for the gland to grip). Be careful not to nick the conductor insulation. Keep the stripping length such that the sealing part of the gland can fully contact the cable sheath.
2. Choosing the correct gland and materials
To ensure a reliable installation, your gland choice must match your application conditions.
A. Sizing and compatibility
The Waterproof Cable Gland must snugly fit the cable’s outer diameter within its rated clamping range. Avoid a gland that is too loose or too tight. For a Stainless Steel Cable Gland, also confirm that its thread type (metric, NPT, PG etc.) matches your enclosure or housing.
B. Sealing class & IP rating
Select a gland that has a sufficient Ingress Protection (IP) rating—commonly IP67, IP68, or higher—depending on how much water exposure or submersion is expected. Many stainless steel cable glands with waterproof design reach IP68 (even IP69K) ratings.
C. Material grade & corrosion resistance
Choose stainless steel grades suitable for your environment (e.g. 304, 316, or 316L) depending on how corrosive your site might be (salt water, chemicals, etc.). The waterproof sealing elements (rubber, O-rings) should be compatible with the environment too (UV, chemical resistance).
3. Installation steps (detailed)
Now, here is a typical step-by-step guide to installing a Waterproof Stainless Steel Cable Gland:
Disassemble the gland components
Remove the nut, sealing ring(s), and any internal inserts from the gland body.
Insert cable through components
Slide the nut and any sealing parts onto the cable in the correct order (nut, washer, sealing ring etc.), ensuring the orientation is correct (often the taper or O-ring side faces the gland body).
Position the gland in the enclosure
Insert the gland body into the opening on the enclosure wall or panel. From inside, you may need to add a locknut or backing nut and washer to hold it in place. Use thread sealant or PTFE tape on threads if needed (check manufacturer’s requirement).
Bring the cable into the gland body
Feed the prepared cable end through the gland body until it reaches the correct depth. Ensure the sealing surfaces align.
Seat the sealing ring
Make sure the rubber or O-ring is properly seated around the outer jacket of the cable, free from twists or pinches.
Tighten the compression nut
Begin by hand-tightening the nut, then use a spanner to further tighten. Make sure to compress the seal evenly. Do not overtighten beyond specified torque (see next section).
Final adjustments & checking
Ensure there is no tilt or offset, the cable is centered, and the seal is uniform around the cable sheath.
These general steps align with many published guidelines for cable gland installation.


 English
 中文简体
中文简体 Español
 عربى
عربى

